Happy Pink Saturday! Thank you to Beverly at How Sweet The Sound for hosting this weekly event.
I have been wanting to do this method of printing on muslin for a while now. As dear hubby always says, it all comes down to having the proper tools. And since I have all my sewing/cutting/printing tools at hand, I thought I’d give it a go. As I was perusing around, I came across Aunt Lindy’s Paper Doll fabric panels. Of course, they have been around for a while, and no one seems to have them anymore, so I found a cute graphic of Dolly Dingle & Billie Bumps, and made my own fabric panels. I resized and tweaked the graphics in Photoshop first. Here is the process I used, and here is where I got the graphics. The only deviation from the process was that I ironed the fabric onto the butcher paper first, then used my rotary cutter to cut a nice 8 1/2″ x 11″ . And the biggest tip in this process is, make sure the muslin (pre-washed) is ironed on really well to the butcher paper. You can see on my photo where Dolly Dingle near her pantaloons snagged a bit. Billie Bumps was my second go, and his printout came out pretty good. I ironed the printout to set the colors ( not sure how well the color washes). Then I just got backing fabric, sewed around the perimeter, stuffed, embellished, and “voila!” who needs to buy a fabric panel, you can make your own! Oh, the possibilities are endless!

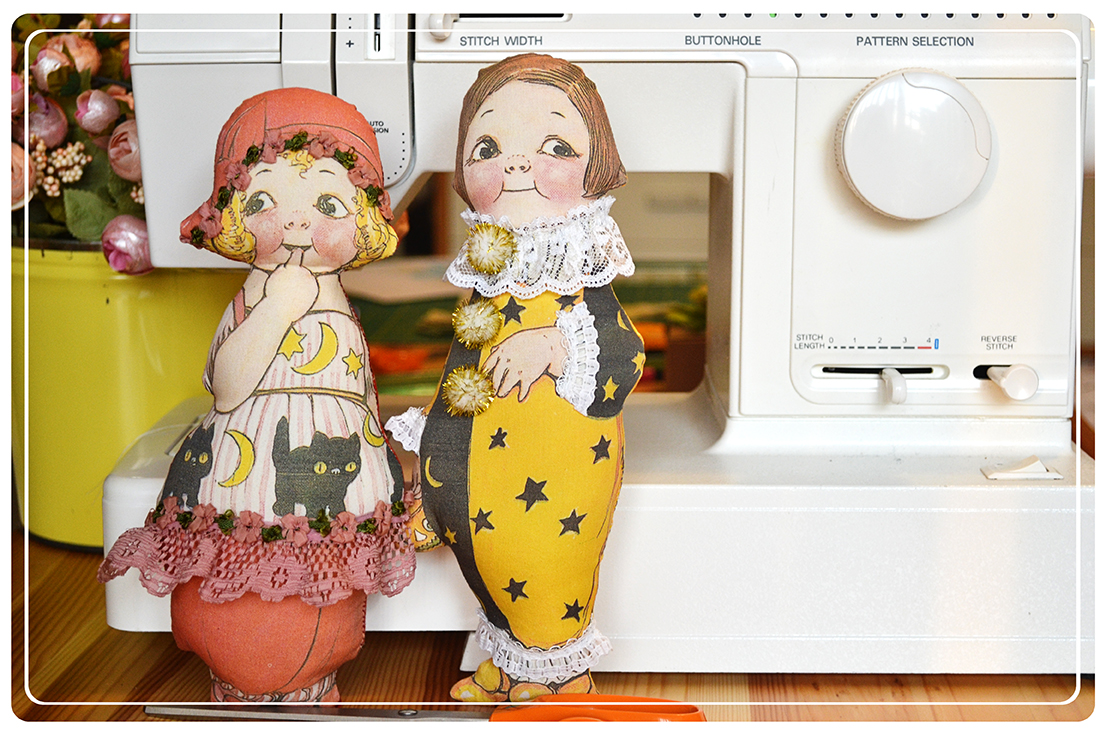 They do look like they lost some weight 🙂 … Oh, and Happy Halloween in July!
Dolls #3 & #4 done! (only 3 to catch up)
– Linda


I am SO impressed! There is no end to your talents! You have to teach me how to transfer photos onto fabric, because I’ve wanted to do a memory quilt for a really long time.
Just discovered your blog via Junosplace !!!!!! Love , love, love your weekly photo masks !!!!!!!
Was very pleased to discovr that the links were all still active. Thank you so mush for sharing your wonderful talent with us. 🙂 I am now a follower 🙂
Oh how cute Linda. Did you know there is printing fabric available, too? I usually buy both white and ivory cotton sheets with either sticky backing or non stick (just sew it) on from Joanne’s fabrics. It’s easier than trying to make my own. They also have silk available, so pretty when making altered art journals. If you need any images, let me know, I have millions……..really!
Hugs,
Meri
They are just adorable.
Okay, those are seriously cute! Thanks for the tutorials, too!
Linda, these are so absolutely cute!! What a fantastic idea. In fact I’m thinking this would be a great idea for a children’s book series I’m working on..though who knows when I’ll be able to complete it. I’m off to take a look at your tutorial now…
Blessings,
Marianne
What a charming project…thanks for the tutorial 🙂
HPS!
Your fabric printing turned out great, the quality is so professional (thanks for the technique links and suggestions) . They are darling dollies, I look forward to seeing them all.
Aren’t they fabulous! I can’t wait to see more Halloween. I’m not rushing summer, but it’s fun to think about fall crafting projects.
these are so sweet. Happy pink Saturday from your newest bloglovin follower ♥
Love these! I have been wanting to try printing on fabric but am too chicken. Yours turned out so cute. Have a wonderful weekend! Holly